Apple Crisp Salted Caramel Bars

apple crisp salted caramel bar on table
apple crisp salted caramel bar

Phew. Encapsulating the past year in a blog post requires a level of dedication that someone who just made a four-layer dessert does not possess.

Now that I’m settled in yet another (new) city, I feel ready to declare myself “baaaaaack.” I have my own kitchen with every gadget I could possibly need. (All that’s left is another oven.) I am entering fall, also known as prime baking season. And, most importantly, I am healed, both mentally and physically, from the challenging experiences of the past few years.

Now I just need some more friends to share these bars with…

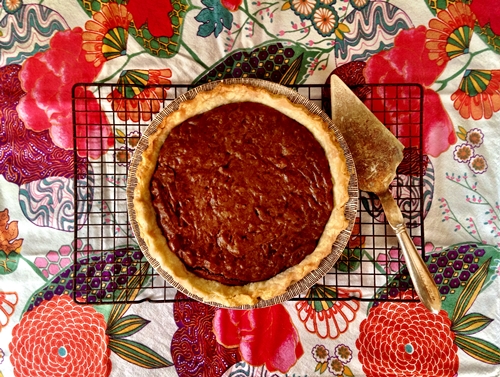
About those bars: imagine if an apple crisp mixed with salted caramel sauce and then melted into a shortbread cookie base.

I know this recipe looks intense, but it actually comes together pretty quickly. Then again, I have a dishwasher again. I CAN DO ANYTHING.

Shortbread base:
1 1/2 sticks (3/4 cup) unsalted butter
2 cups all-purpose flour
1/2 cup packed light brown sugar
1/2 teaspoon salt

1) Preheat oven to 350 degrees. Line a 9 x 13 inch baking pan with parchment paper.
2) Cut butter into 1/2-inch pieces. In a food processor, process the flour, sugar and salt briefly, then add the butter and process until the mixture begins to form small lumps.
3) Sprinkle mixture onto the baking pan and press the mixture evenly onto the bottom.
4) Bake shortbread in middle of oven until golden, about 20 minutes. Let cool completely while preparing other ingredients. Keep the oven at 350 degrees.

Salted caramel sauce:
1 cup granulated sugar
6 tablespoons salted butter, cut up into 6 pieces
1/2 cup heavy cream
1 teaspoon salt

1) Follow these directions from Sally’s Baking Addiction.
2) Once the caramel has cooled and thickened, pour it over the cooled shortbread base and spread evenly.

Apple filling: 
2 tablespoons unsalted butter
10 Granny Smith apples, peeled, cored and thinly sliced
1/2 cup granulated sugar
1 teaspoon cinnamon
1/2 teaspoon nutmeg
1/8 teaspoon ground cloves
1/8 cup cornstarch

1) Heat a large pot over medium heat. Add the butter and let it melt, then stir in the apples. Cook for about five minutes to let apples release their liquid.
2) Stir in the sugar, cinnamon, nutmeg and cloves. Let cook for another five minutes.
3) Stir in the cornstarch and cook for another minute, until liquid has thickened. Set apples aside to cool, then spread them over the salted caramel shortbread base.

Crisp topping:
1 teaspoon ground cinnamon
1 cup brown sugar
3/4 cup old-fashioned oats
3/4 cup all-purpose flour
1 teaspoon ground cinnamon
1 stick (1/2 cup) cold butter, cut into pieces

1) Mix brown sugar, oats, flour and cinnamon in a mixing bowl. Use a pastry cutter or paddle attachment on a stand mixer to combine cold butter into the mixture until it resembles coarse crumbs.
2) Sprinkle crisp crumbs over the apples in the baking dish and press crumbs gently into the pan.
3) Place the baking pan on a center rack in the oven and bake for about 30 minutes, until apples are bubbling and crisp looks, well, crisp.
4) Let the bars cool completely on a cooling rack before slicing. You might even want to refrigerate them for an hour to make sure that they don’t crumble.

Rustic Peach Tart

rustic peach tart

There’s a crisp edge to the breeze today, but we still had a few leftover peaches that were just begging to be baked. This dessert felt like a swan song to summer, and I can’t say I’ll be too sad to see it go.

Despite the fact that I’d gladly never hear the word “pumpkin spice” again, autumn remains my favorite season. This year, with the re-introduction of a work routine, there’s a pleasant cadence to my days.

Not to mention the re-introduction of chunky sweaters, leather boots, and flannel sheets. And a resurgence of a certain man’s beard and his plaid shirts. Nothing says fall like a good beard, amirite?

(Seriously though, please stop talking about pumpkin spice. Chai is a better spice blend, anyway. Plus, it does not purport to contain an ingredient that cannot actually be found in its ingredient list. There is no pumpkin in pumpkin spice, it’s just the mixture used to flavor overrated pumpkin foods like pumpkin pie. The concept of “pumpkin spice lattes” is akin to me serving a “s’mores milkshake” that contains no graham cracker or marshmallows, but hey, at least it has the chocolate part down! STOP THE MADNESS.)

But where were we? Peaches. Right. Peaches. Their season is far too short and they’re one of the foods that starts with “p” that I support.

Tart Dough:
Makes 2 12-inch tarts
2 cups flour
1/2 teaspoon salt
12 tablespoons cold butter, cubed
1/2 cup ice-cold water

1) Cut the butter into the flour with your fingers or with a stand mixer. Pour in the water slowly, until the dough begins to clump. (Mix for 30 seconds or less if using a mixer.)
2) Divide the dough in two and create two balls of dough. Wrap with plastic and compress into disks. Refrigerate for 1 hour.

Peach Filling:
Note: This recipe makes enough to fill one tart. Double the recipe if you want two!
4 peaches, peeled and sliced
1 teaspoon vanilla extract
1 teaspoon cornstarch
1 teaspoon cinnamon
3 tablespoons of sugar, divided
1 egg
1 teaspoon of water

1) Preheat the oven to 375 degrees. Remove one of the tart dough sections from the fridge and roll into a circle with a rolling pin until the dough is about 12 inches in diameter. Place on a cookie sheet lined with parchment paper or a Silpat and refrigerate for 10 minutes.
2) Combine the peaches, vanilla extract, cornstarch, cinnamon, and one tablespoon of sugar in a bowl.
3) Remove the dough from the fridge and arrange the peaches artfully upon it, leaving a border of 1 and 1/2 inches. Fold the border over the peaches to make a crust.
4) Mix the egg and water together and brush gently over the crust. Sprinkle the whole tart with the remaining two tablespoons of sugar. Place the tart on the lower rack in the oven and cook for 45 to 55 minutes until the crust is golden brown.

Savory Tart Two Ways: Tomato & Goat Cheese and Asparagus & Mushroom

tomato tart
asparagus tart
tart plate

It’s been three years since my last first day of school, but every August I still sleep restlessly the night before it all starts again. I just can’t seem to shake the feeling that I’m going to be tardy for class the next morning.

This year, that feeling was exacerbated by the promise of waking up to a new job, but going to bed remembering where I was just one year ago — in a city that moved even faster than I imagined and left me dazed and adrift.

I can officially say that this year served as my quarter-life crisis. Reading over the blog posts I wrote in high school, I can see how the seeds were sown years earlier. A girl so eager to bust out of where she was that she forgot to stop and take a look around at what she might already have. And I’d been on that trajectory ever since, hurling toward a life I thought I wanted, of working hard and playing hard and collecting stories and battle scars along the way.

As it turns out, I’ve managed to assemble quite a good collection since coming home. The pace is better for me here. And, lucky for you, I have plenty of time to invest in things that I love… like baking tarts.

Tart Dough:
Makes 2 12-inch tarts
2 cups flour
1/2 teaspoon salt
12 tablespoons cold butter, cubed
1/2 cup ice-cold water

1) Cut the butter into the flour with your fingers or with a stand mixer. Pour in the water slowly, until the dough begins to clump. (Mix for 30 seconds or less if using a mixer.)
2) Divide the dough in two and create two balls of dough. Wrap with plastic and compress into disks. Refrigerate for 1 hour.

Tomato & Goat Cheese Filling:
Note: This recipe makes enough to fill one tart. Double the recipe if you want two!
4 ounces of goat cheese, room temperature
bunch of basil
salt & pepper
1 pint of cherry heirloom tomatoes
1 garlic clove, slivered
1 tablespoon olive oil
1 egg
1 teaspoon of water

1) Preheat the oven to 375 degrees. Remove one of the tart dough sections from the fridge and roll into a circle with a rolling pin until the dough is about 12 inches in diameter. Place on a cookie sheet lined with parchment paper or a Silpat and refrigerate for 10 minutes.
2) Combine the goat cheese, a few of the basil leaves, salt and pepper, then spread over the chilled tart, leaving a border of 1 and 1/2 inches. Place the tomatoes evenly across the goat cheese. Sprinkle with garlic and drizzle with olive oil.
3) Fold the border over the cheese and tomatoes to make a crust. Mix the egg and water together and brush gently over the crust. Place the tart on the lower rack in the oven and cook for 45 to 55 minutes until the crust is golden brown.

Asparagus & Mushroom Tart:
Note: This recipe makes enough to fill one tart. Double the recipe if you want two!
1 tablespoon butter
1 pint mushrooms
1 teaspoon fresh rosemary, chopped
salt & pepper
1/2 cup mascarpone cheese, room temperature
1 bunch (about 15 pieces) of asparagus
1 garlic clove, slivered
1 tablespoon olive oil
1 egg
1 teaspoon of water

1) Preheat the oven to 375 degrees. Remove one of the tart dough sections from the fridge and roll into a circle with a rolling pin until the dough is about 12 inches in diameter. Place on a cookie sheet lined with parchment paper or a Silpat and refrigerate for 10 minutes.
2) Heat a pan over medium heat with the butter. Once melted, add mushrooms and cook until softened and browning, about 10 minutes. Add rosemary, salt and pepper and cook for another 2 minutes. Turn off heat and set aside.
3) Remove tart dough from the fridge and spread with mascarpone cheese. Top with mushroom mixture, then arrange the asparagus on top. Sprinkle with garlic, then drizzle with olive oil.
4) Fold the border over the cheese and asparagus to make a crust. Mix the egg and water together and brush gently over the crust. Place the tart on the lower rack in the oven and cook for 45 to 55 minutes until the crust is golden brown.

Peach & Blueberry Bruschetta with Ricotta

fruit bruschetta

The moment I discovered this recipe, I knew it was going to change my potluck game forever.

bruschetta close-up

Oh, and also breakfast. Leftovers make the perfect breakfast.

Change out the fruit for whatever you prefer, but I like peaches and blueberries for this time of year.

My recipe is adapted from this one from Bon Appetit.

Peach & Blueberry Bruschetta with Ricotta:
Makes about 24 pieces

3 peaches, pitted and thinly sliced
1 cup blueberries
2 tablespoons sugar, divided
Sea salt
1/2 teaspoon pure vanilla extract
1 cup whole-milk ricotta
1 baguette, sliced 1/2-inch thick, toasted
Olive oil for drizzling
Basil, optional

1) Combine peaches, blueberries, 1 tablespoon of sugar, a pinch of salt, and vanilla extract in a medium bowl. Let the fruit mixture sit for at least 15 minutes.
2) Meanwhile, whisk ricotta and remaining 1 tablespoon sugar in another medium bowl until smooth.
3) Spread toasted baguette slices with ricotta mixture, then top with fruit. Drizzle with olive oil, sprinkle with salt, and top with basil, if desired.

Avocado & Walnut Pesto

avocado pesto pasta

When summer hits here, and I mean really hits, it means we’re in for 2.5 months of humidity that penetrates so deeply that even ones bones feel saturated with sweat.

I rarely relish the thought of spending any time at all in a kitchen with a heated oven, which means I become even more committed to meals that require a pot, a stovetop, and little else (although, in this case, a food processor helps).

I’ve made this recipe twice in the past month and I expect to make it a lot more. Topped with roasted or grilled veggies, it’s a complete meal. The avocado imparts a smooth, buttery texture while the walnuts add just enough crunch.

Plus, skip the Parmesan, and you have a sauce fit for a vegan.

Avocado Pesto
Makes 4 healthy servings

1 pound of pasta
2 ripe avocados
1 packed cup fresh basil leaves
1 tablespoon lemon juice
2 cloves garlic, minced
1 cup grated Parmesan cheese
1/2 cup walnuts
1 teaspoon salt
1/2 teaspoon black pepper
olive oil, as needed

1) Boil a large pot of water and cook the pasta according to package directions. Before draining, reserve about 1 cup of the pasta water and set aside both the water and the cooked pasta.
2) Place the avocado flesh, basil, lemon juice, garlic, grated Parmesan, walnuts, salt and pepper in a food processor and blend until the walnuts are finely chopped. If the mixture is too thick to blend, slowly pour in some olive oil.
3) Spoon the pesto over the pasta and toss together. Add in the pasta water a little at a time if the pesto still needs to be thinned out. Serve immediately.

Strawberry Chiffon Pie with Pretzel Crust

full pie

Strawberry season is quite an event in our household, and has been for as long as I can remember. Every year we comb our local pick-your-own-strawberries farm website for the date that promises pounds of our favorite sweet treat.

And I do mean pounds. As we’ve grown older, we are less distracted by the immediate temptation of a plump, ripe strawberry and are more focused on the promise of strawberry meals to come. We each choose a row with careful consideration and compete to see who can come away with the most full bucket. One of our best combined hauls came in at around 15 pounds.

Not one went to waste. They’re mashed for strawberry shortcake, strawberry jam, strawberry crumble and, one of my personal favorites, strawberry chiffon pie.

full pie to the side

Strawberry Chiffon Pie is one of those rare holdovers from what I call the “gelatin period of history” that actually tastes delicious and comes in a naturally occurring shape. This particular recipe is from my mom’s 1965 printing of The Settlement Cook Book.

As you might be aware, the 50s and 60s were rife with both social change and gelatinous foods. From random produce floating in towering Jell-O molds to savory aspics made from stock, there was nothing that people wouldn’t throw gelatin into. (If you’ve seen Julie & Julia, you know what I mean.)

I also like to imagine that the Space Race inspired everyday people to try their own science experiments, and making foods congeal seemed like the most accessible option.

This pie, however, is one science experiment I can get behind. It’s basically a strawberry-flavored whipped cream filling that is fluffy and creamy and requires minimal oven time. (Or none at all if you choose not to make your own crust.)

Speaking of crust — I decided to get a little wild with mine. Normally our family makes this pie with a graham cracker crust, but I love the salty/sweet combination that occurs when sweet strawberry cream meets salty pretzels. In fact, I’m going through a little “snack foods as pie crusts” period myself, so stay tuned for more innovation!

Strawberry Chiffon Filling
Makes enough to fill 1 9-inch pie crust, plus some extra for taste-testing

1 envelope (or 1 tablespoon) of unflavored gelatin
1/4 cup cold water
1/2 cup boiling water
1 cup sugar, divided
1 cup strawberries, mashed (with juices), plus more for decorating
1/4 teaspoon of salt
2 egg whites, room temperature
1/2 cup of heavy creamy, whipped, plus more for decorating
1 prepared pie shell, like the pretzel crust below

1) Soak gelatin with cold water in a large bowl for 5 minutes. In a separate bowl, combine the boiling water, 3/4 cup of sugar, mashed strawberries and salt, then pour the mixture into the softened gelatin until the gelatin dissolves. Let cool.
2) In a stand mixer with the beater attachment or with a whisk, beat the egg whites until foamy. Gradually add the remaining 1/4 cup of sugar and continue beating the egg whites until they’re stiff and glossy. Set aside.
3) When the strawberry and gelatin mixture begins to thicken as it’s cooling, fold in the whipped cream and then the beaten egg whites.
4) Pour the chiffon filling into the prepared crust, then cover and refrigerate for 3 to 4 hours, or until the filling has set. Decorate with strawberries and whipped cream.

Pretzel Pie Crust
Makes 1 9-inch pie crust

3/4 cup butter, softened
3 tablespoons brown sugar
2 1/2 cups crushed pretzels
(Tip: To crush the pretzels, place them in a freezer bag, remove all the air, then roll a rolling pin over the pretzels until they’re crushed. You might need to repeat this step several times.)

1) Preheat oven to 350 degrees. In a bowl, mix together butter, sugar and pretzels until well-combined. Press the mixture into a 9-inch pie pan. Bake in oven for 10 minutes, let cool, then fill with strawberry chiffon pie filling.

Smoked Cheddar Gougeres

gougere side view

We stood schmoozing around the kitchen island, savoring pillowy gougeres followed easily with sweet champagne, when it happened. Maybe the threat of the impending winter chill drew us closer together, or perhaps it was our need to tangibly express the deep connections we had formed, but suddenly, each person’s arms encircled the two waists of those standing closest, and we broke into singing the alma mater “Hark the Sound.”

When we completed the song, we were changed. What began as a class of strangers became a family. As I would later tell tour groups of potential students and their parents, that fleeting moment reaffirmed my love for the community I found at UNC.

gougere top view

I suppose that’s what I’ve sought to recreate since I’ve graduated. Wherever I go, I crave those arms around me, and I’ve been lucky enough to find them.

Tomorrow I go into surgery, and already I’ve been overwhelmed by the amount of support I’ve received from people both near and far. I’ve realized how much I value community — sometimes one needs a reminder. It’s nice to have lots of arms to fall into.

Once again I find myself in a moment like the one that occurred around my professor’s kitchen island, where everything came together in a moment of delicious clarity. And I thank you, friends and family, for that.

Recipe based of off this one. The best smoked cheddar ever can be ordered online here.

Smoked Cheddar Gougeres
Makes about three dozen

1/2 cup water
1/2 cup milk
1 stick unsalted butter, cut into tablespoons
Large pinch of coarse salt
1 cup all-purpose flour
4 large eggs
1 cup shredded smoked cheddar, plus more for sprinkling
Freshly ground pepper
Freshly grated nutmeg

1) Preheat the oven to 400°. Line 2 baking sheets with parchment paper or Silpats. In a medium saucepan, combine the water, milk, butter and salt and bring to a boil over medium heat. Add the flour and stir it in with a wooden spoon until a smooth dough forms; stir over low heat until it dries out and pulls away from the pan, about 2 minutes.
2) Scrape the dough into a mixing bowl; let cool for 1 minute. (Waiting a bit ensures that the eggs won’t cook and scramble in the dough.) Beat the eggs into the dough, 1 at a time, beating thoroughly between each one. Add the cheese and a pinch each of pepper and nutmeg.
3) Transfer the dough to a large plastic bag and cut about 1/2 inch off the corner diagonally. Pipe tablespoon-size mounds onto the baking sheets, 2 inches apart. Sprinkle with cheese and bake for 22 minutes, or until puffed and golden brown. Serve hot, or let cool and refrigerate or freeze. Reheat in a 350° oven until piping hot.

Sauteed Kale with Bacon & Onion

kale close-up

Like any good Millennial, I frequently hate-read trend pieces about Millennials. One of my favorite facts about our generation, besides the fact that we are all lazy and entitled, is that 21.6 million of us live at home. And while I understand the larger social implications of such a staggering statistic, I have a confession to make.

I love it.

My parents make great landlords. They mostly charge in homemade meals, which I am more than happy to provide. In exchange, I get a cozy bed, a live-in accountant (dad) and a conveniently-located business partner/fellow crafter (mom).

Home is all the more comfortable when you’ve experienced what it’s like out there. I will not pretend the decision to come back was an easy one — it felt like admitting defeat after living two years on my own in THE big city.

But the best thing I could’ve done for myself was pressing restart. Trying again. This time in a space that always smells faintly of chocolate chip cookies and offers frequent warm embraces.

With every passing day I feel more like myself, once again bursting with enthusiasm and optimism. I can’t say exactly why those qualities felt so suppressed by city life, but I know that soon they will be the very qualities that lead me, eagerly, back into the great unknown.

For now, I close my eyes and allow the familiarity of home to cover me like a blanket.

kale

Speaking of cooking for my parents, I made this meal as a delayed birthday present for my dad. I won’t reveal his age, but let’s just say that it now ends in 0.

I loathe raw kale, but we have an inordinate amount of fresh produce right now from our CSA; I had to do something with at least a few of our greens. Besides the dreadful, inedible texture of raw kale, it feels like the most self-righteous of vegetables, like it’s somehow my problem that I can’t eat it without a 30-minute lemon juice massage.

The best way to spite kale is to rob it of its healthy reputation, so I added bacon and butter and called it a day. The fact that I was serving the kale with buttermilk fried chicken and buttermilk biscuits probably contributed to my inspiration.

Sauteed Kale with Bacon & Onions
Serves 4

2 strips bacon, chopped (I cut them with kitchen shears)
2 tablespoons butter
1 sweet onion, diced
1 – 1.5 cups vegetable or chicken stock
6 cups kale
Pepper, to taste

1) Heat a high-sided pan to medium-high. Add the chopped bacon and cook for about one minute. Add the butter and cook until melted. Stir in the onion and cook until softened, about five minutes.
2) Pour in the stock to deglaze the pan and add the kale. If it doesn’t all fit, stir in a few cups at a time. It will cook down quickly. Lower the heat to medium-low and cook with the lid on for five minutes.
3) Remove the lid and raise the heat, adding the pepper and stirring constantly until all of the liquid has cooked off, which should only take another minute or two. Serve immediately.

One-Pot Pasta

pasta pot

Sometimes you need to be able to throw everything into a pot and call it a meal.

I had one of those days yesterday. April was taunting me with one of its proverbial showers when I’d already grown re-accustomed to the warm North Carolina spring and my sewing machine wasn’t cooperating and I was grumpy and the pimple on my chin was growing large enough to declare autonomy. Basically, in no mood for cooking. Or human interaction, for that matter.

The last time I had this dish it was made for me by a dear friend, and I find that when I need a lift, summoning up a fond food memory often does the trick. (With the proper meal accompaniment, of course.)

Now that I’ve made it myself, I am officially a convert. The pasta starch imparts a creamy texture to the sauce and the steps could not be easier. It’s a meal worth sharing, and I am grateful that I was able to share it with my friend — and now with you.

plated pasta

I adapted my recipe from this one.

One-Pot Pasta
Serves 4

12 ounces linguine
16-ounce can diced tomatoes
2 cups fresh spinach
1 onion, thinly sliced
6 cloves garlic, thinly sliced
1/2 teaspoon red-pepper flakes
kosher salt and freshly ground pepper
4 cups water
4 sprigs basil, divided
4 tablespoons olive oil, divided
Parmesan cheese

1) Combine first eight ingredients in a pot wide enough to allow the pasta to lie flat against the bottom. Add 2 sprigs of basil and 2 tablespoons of olive oil.
2) Put the pot over high heat and bring to a boil. Stir regularly for about 10 minutes.
3) Serve the pasta with the remaining 2 sprigs of basil, drizzle with the remaining 2 tablespoons of olive oil, and sprinkle with Parmesan cheese.

Tar Heel Pie

Tar Heel pie

It feels appropriate to revive the blog with a recipe called “Tar Heel Pie.” I imagine the name has something to do with its North Carolinian origins, if not its fudgey consistency that could be considered tar-like if you were into making such unappetizing comparisons. Basically, imagine a flaky pie crust. Now imagine that pie crust filled with a pecan-laden brownie. That’s Tar Heel pie. (And you thought that particular food fantasy would never be realized. Silly you!)

I know I tend to get hyperbolic with some regularity, but this pie, after only one baking attempt and three tastings, is officially in my top 5 favorite desserts of all time. If you are planning on inviting me to any kind of event in the next few months, I will likely bring this pie. If you are not planning on inviting me to your event, more for me.

My recipe came from my dear friend Nancie McDermott, who has written an entire book about Southern pies. Check out the recipe here — I followed the recipe exactly, so no reason to paste it here!

Rather than using a store-bought crust, which I couldn’t find in a form that involved real butter, I made my own. It’s totally unnecessary, but I had a rainy day to kill. What better way to spend it than whipping up some pastry dough?

Single Pie Crust
Makes one 9-inch pie crust
1 1/4 cups all-purpose flour
1/4 teaspoon salt
1/2 cup butter, chilled and diced
1/4 cup ice water

1) In a large bowl, combine flour and salt. You can then either cut in the butter until mixture resembles coarse crumbs, or grate in the butter using a cheese grater and mix into the flour and salt. (I typically freeze the butter first, then grate it, then freeze it again for a few minutes so that it stays really cold.)
3) Stir in water, a tablespoon at a time, until mixture forms a ball. Wrap in plastic and refrigerate for 4 hours or overnight.
4) Roll dough out to fit a 9 inch pie plate. Place crust in pie plate. Press the dough evenly into the bottom and sides of the pie plate. Finish with a crimped or scalloped edge.